
Creative Tips for Using Dried Flowers in Mixed Media
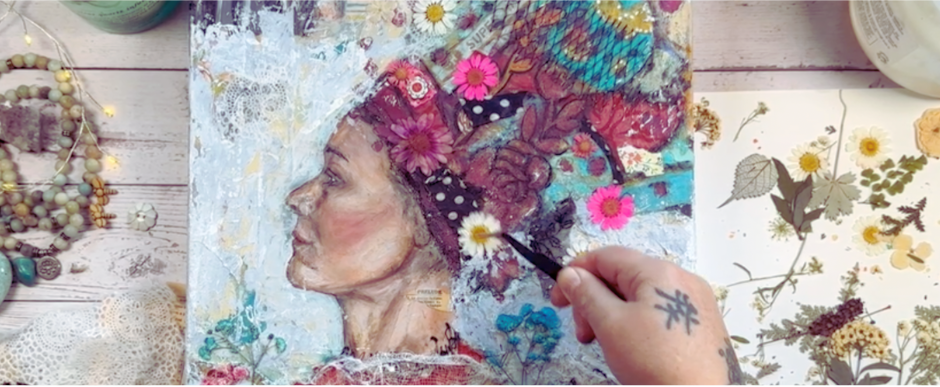
As I was creating the new Personal Portraits workshop, I found myself reaching for something I haven’t used in my portraits until now: dried flowers.
They’re a bit fussy, if I’m being honest. Fragile. Easy to tear or crumble if you rush them. They ask for slower hands and a little more care than paper ever does. But once they settle into a piece, they add something special. A touch of whimsy and the essence of nature’s beauty.
I’ve really been loving incorporating dried flowers into my collage work. Their delicate, natural beauty brings a softness and presence that I can’t quite get enough of. And while they can be a little tricky to work with, they’re so worth the extra attention.

Over time, I’ve picked up a few small tips that make working with them feel more easeful and much more successful. If you’ve been curious about adding dried flowers to your own art, here are a few things to keep in mind.
Make sure they’re fully dried
Before you even think about adding flowers to your artwork, make sure they’re completely dry. Pressed flowers or air dried blooms work best. Any remaining moisture can lead to browning or even mold, and that’s never a fun surprise.
Seal and protect
Once you’ve chosen your flowers, use an art medium like matte gel or Mod Podge to adhere them to your collage. Be sure to gently brush the medium over the top of the flowers as well. This helps seal them in place and protects them from crumbling, fading, or yellowing over time.
Layer lightly
Because dried flowers are so delicate, a light touch goes a long way. Apply adhesive sparingly and use a soft brush to avoid tearing petals. If you’re working with thicker blooms, trimming or snipping them into smaller pieces can make them much easier to layer.

Mix with other materials
Dried flowers pair beautifully with other organic elements like twine, handmade papers, or bits of dried leaves. That mix of soft petals and rougher textures can add so much richness and interest to a piece.
Play with placement
Before gluing anything down, take a moment to move the flowers around on your surface. Sometimes they want to be the focal point. Other times they work best scattered quietly in the background, like wildflowers in a field. Let your intuition lead here. You’ll feel it when it’s right.
Sunlight is the enemy
Once your piece is finished, keep in mind that direct sunlight can fade dried flowers over time. Display your art in a shaded spot, or frame it with UV protective glass to help the colours stay true.
There’s something really special about preserving a small piece of nature in your work. When handled with care, dried flowers can add a quiet beauty and sense of life to your collage, helping your art bloom in its own time.
A small note about sourcing dried flowers
If working with dried flowers has sparked your curiosity, but you don’t happen to have any on hand, I wanted to share a simple option.
There’s a great selection of dried and pressed flowers available on Amazon, which can be an easy way to experiment without needing to press your own or wait for the seasons to line up. I’ve found this especially helpful when I’m in the middle of a project and want to keep moving.
Here is a link to a set that I purchased and enjoyed working with: 50 Piece Dried Flower Bundle
If gathering flowers yourself feels like too much right now, this can be a simple way to try them out and see how they feel in your hands.
Sending warmth your way as we move through these winter days together.

P.S. The new version of Personal Portraits is here. If working with faces, layers, and meaningful materials has been calling to you, you can step into it now. You can take a closer look here: PERSONAL PORTRAITS
Note: Some links in this email are affiliate links, which means I may earn a small commission—at no extra cost to you. Thank you for your support! 💛
Comments